When you see this symbol, click to read related discussion in the Forum. When you see this symbol, click to read related discussion in the Forum.
October 2, 2006
I hate those Extreme Makeover shows. The other day I looked around at what we have left to do and convinced myself that if we had enough people working on the house all at once, that it really could be finished in one day. For a short while that idea made me feel really good. Now that thought's just dogging me. Especially when I haven't gotten as much done at the end of the day as I had hoped. Yeah, women are supposed to be rail thin fashion models and houses are supposed to be built in a week. Stupid TV...
I also installed the baseboard in the the master bedroom since we're committed to carpeting that room.
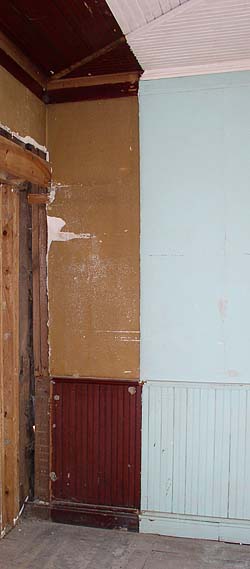
I really wish that I had been able to install all of the baseboard prior to the plastering. But for time and budget (the baseboard would be more expensive because it would need to be thicker) I opted to install 1/2" beaded baseboard after the plaster was done. But the irregularities in the plaster keep this from being a real speedy job. Getting a nice tight fit to the wall takes some finessing. But when it's done it looks good. Gay primed and painted all of the baseboard before we installed it. October 3, 2006
The plasterer packed up and moved out this afternoon! That's a good sign, but it doesn't mean that he's gone for good. I need to do some trim work on the staircase before he can do the downstairs center hall. I've been waiting on stock for this for two weeks now. I ordered some custom-milled poplar in the ultra-wide widths that I need for the skirt boards. But other than that area, the plasterer has finished everything else!
The 8 penny cut nails that we're using to face nail everything are starting to put a hurt on my right hand. Everybody was asking me if nailing the siding with cut nails was getting me. That was no problem, but the floor nailing is much harder.
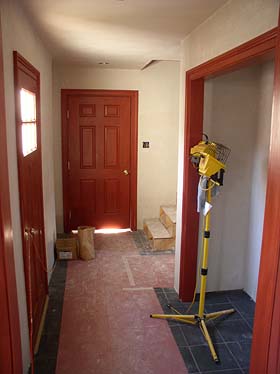
Pantry on the right. Garage straight ahead. Turn right to go to the laundry room and the guest bath. The stairs by the garage door go to the room above the garage.
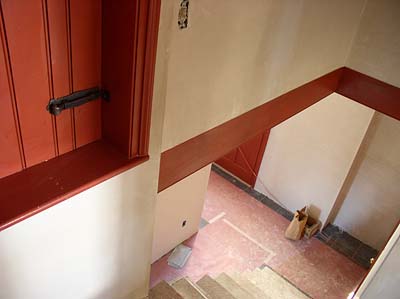
This is a weird angle, but this is the view from the landing on that back staircase, looking down. The small door on the left goes to our attic. October 4, 2006
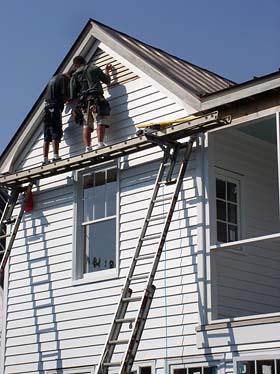
The siding guys were back at work today and actually got the first of four gable vents installed. It's so nice to finally see a gable almost finished.
The brick mason came back today and finished the top of the chimney, bringing the tile flue above the brick top and the sealing everything off with mortar. October 8, 2006
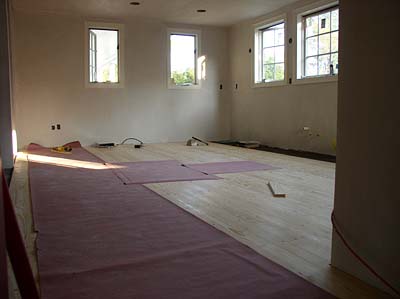
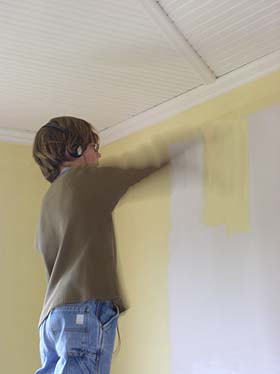
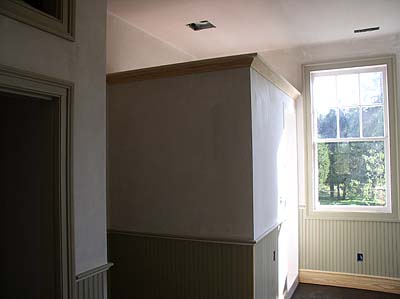
We were on a mission to get William's bedroom painted this weekend. We started by priming the walls with a lovely buttercup yellow. And then followed up with two coats of the final color.
We still have some details to finish up. Like the trim at the top of the closet. Both the bed moulding and the trim board below it will both be the same off white as the ceiling.
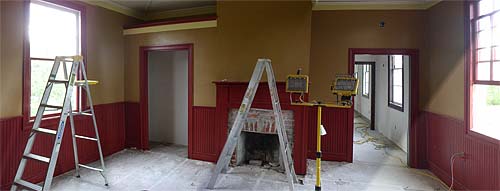
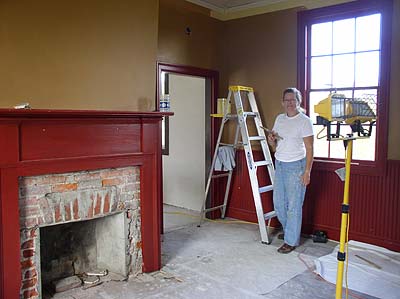
It's a good match. The only differences are that the red was originally a rich red stain and that was also the color of the ceiling. We opted to keep the ceiling light rather than closing the whole room in with dark colors. I was a little concerned about the heaviness of this color scheme, but it looks good. The room is big enough to handle it.
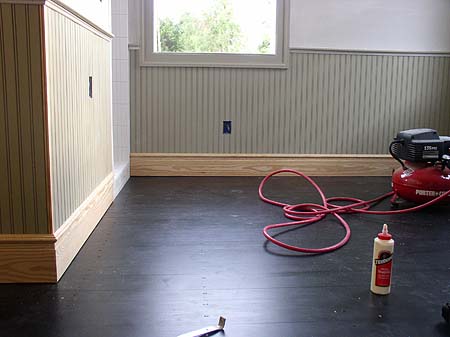
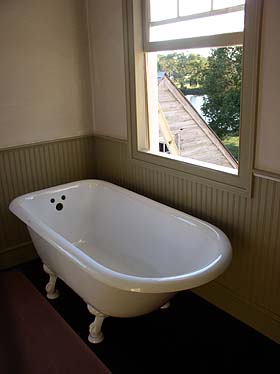
And yes, we painted the floor black. It's something you see free frequently around here in old farm houses. We love the look, but I'm not sure if we'll actually be able to live with it. Of course it will show everything...baby powder, dog hairs, you name it. But it sure will make the white clawfoot tub and sinks pop. Dunno, we're going to live it with it a little while and then decide. That's the great thing about paint. You can make bold decisions and, if they don't work out, you just repaint. Other than that, the only thing I have left in here is the shoe moulding (waiting until we decide on the floor color) and some kind of cap for the top of the half wall around the shower. -- Bill October 9, 2006
Well, to begin the day, my mom painted the board arround the ceiling the same color as the wall. It was going to be white but that looked awkward. By unanimous vote, we decided to make it blend in with the wall. I like it better this way.
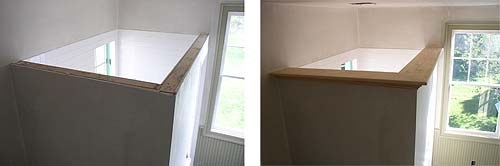
Meanwhile, in the master bathroom, my dad added the "shower cap" (heh heh). Working in sock feet so as not to mar the new floor, this took a while but wound up looking great.
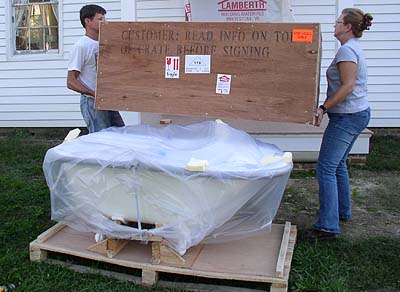
By the way, I was slacking the whole day because I got a day off for finishing my painting. I was, however, searching for the fabled tub truck that was supposed to arrive bearing 400 pound cast iron gifts from Vintage Tub & Bath. At about 5:30 in the morning, I heard a trucklike rattle outside and feverishly grabbed a big flashlight and pressed my face against the windowpane and flashed the beacon arround the yard in search of the tub-carrying behemoth. I was disheartened to discover that the "truck" was a van coming down the road. Suddenly, I felt like a moron for pressing my face against the window and lighting it up campfire/spooky style while probably scaring the sense out of the poor driver with my light.
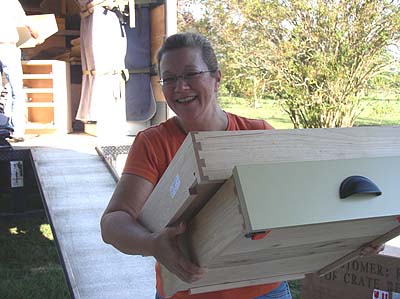
My Mom got a nice new clawfoot tub and I got a nice box. -- William (below, in the box)
P.S. I look wierd in this picture. I really don't look that wierd. Trust me. October 10, 2006
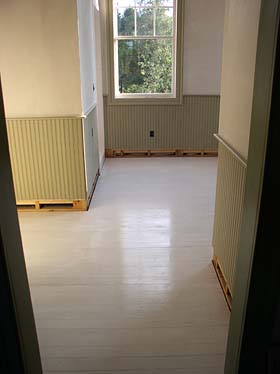
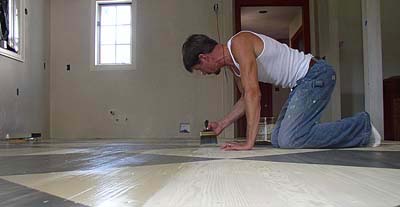
I spent the day on my hands and knees in the kitchen.
The result is kind of a pickled effect. The color (which is hard to capture accurately with the camera) relates to our kitchen island. October 11, 2006
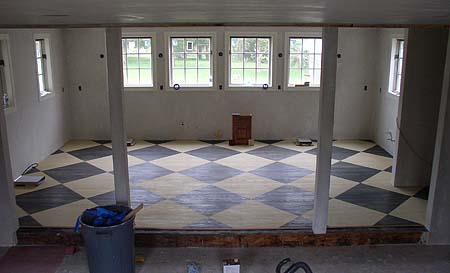
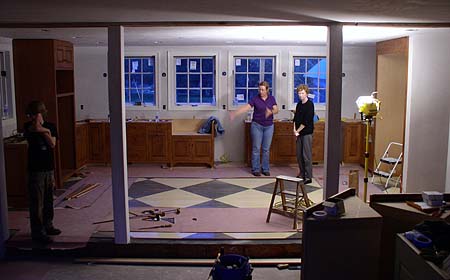
It's so funny to watch Gay these days. She's like a little girl at Christmas. All the things that she's been looking forward to for so long are finally coming together. Her clawfoot tub. Her kitchen cabinets (arriving tomorrow). And her checkerboard kitchen floor. Those are the big three that she's been waiting for. Oh...and the kitchen appliances. Those are the big four that she's been waiting for. Oh...and a washer and dryer. Yeah...those five things.
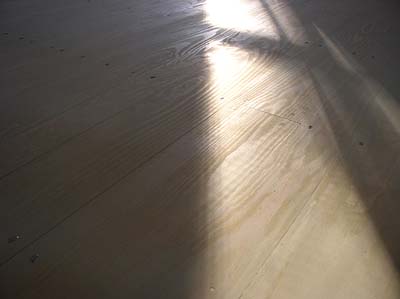
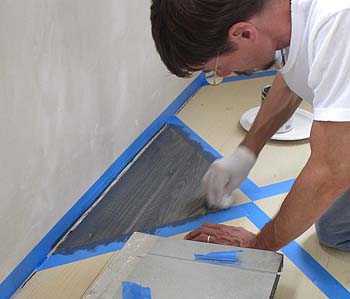
Big ole diamonds! We settled on 32 inches as the magic size.
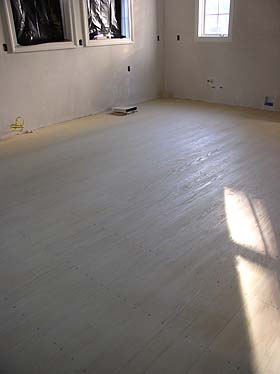
We used an acrylic primer tinted black and I wiped it on just like the base coat so that the grain shows through. It was a bit of a challenge because it dries so quickly. Even more so than the base coat it seemed. Each diamond was a race. Wipe in on, wipe it off, quickly smooth it out before it dries.
A couple people emailed me last night asking why we bothered to paint the entire floor when cabinets will be covering the perimeter and an island will be in the center. Two reasons... First, I just don't like the idea that somebody (a grandchild maybe) might tear out the cabinets 50 years from now and find that I chintzed out on the paint job. But more importantly, those areas that will be under the cabinets are where I start and figure out my technique before proceeding to the parts of the floor that will be seen by everybody. Best to learn and make any mistakes where nobody can see it! October 12, 2006
Wow. Busy day!
There's Gay doing more of that giggling I was talking about.
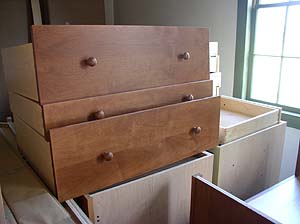
I particularly like the round top and bead detail on the two corner shelves. We specified this design to carry through a look from the bookcases in the library. (That top shelf will be removed.)
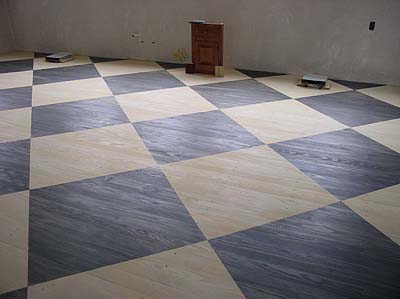
Right now, they're all stacked in the family room until the floor dries.
Also speaking of the floor, I put on two coats of the acrylic polyurethane today. We opted for a gloss finish for better cleanability. (Is that a real word?)
I tell you, I'm a johnny-come-lately to the idea of water-based primers, stains, and polyurethanes. In fact, this is my first time using these products and I am very impressed. This may be a life-changing event for me.
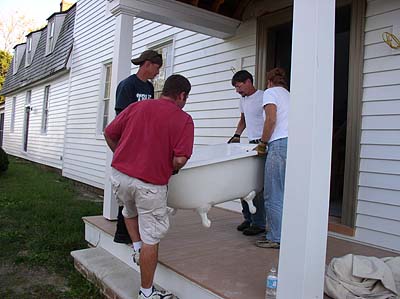
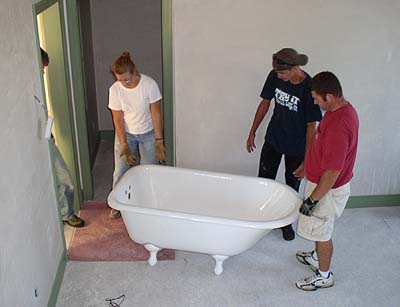
The tub weighs 335 pounds. (700-some-odd-pounds when filled with water...plus, the weight of the bather. We opted to carry it empty.) With four people it was really a piece of cake.
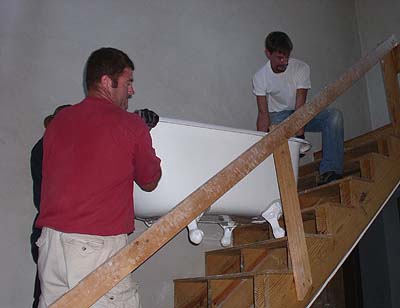
I was very happy to finally reach the landing.
It was smooth sailing from there until we reached the bathroom door, which Gay pointed out was too small for the tub.
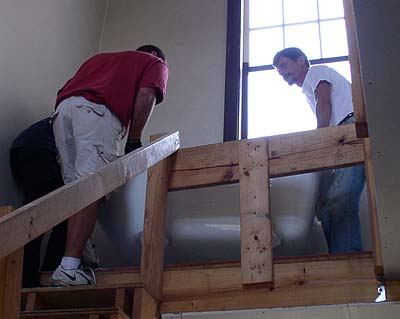
The plan to turn the tub on its side proved difficult because if you're not holding onto the feet, then all that's left is to try to grip the tub's super smooth round bottom. Which doesn't work so well. After some deliberations I had an idea and asked Gay to go get her most prized possession. Her "Scoot-N-Do." It's a little plastic seat with wheels that is usually used for gardening. Would it hold up to the weight of the tub or would it crunch into little bits? Right upfront I promised Gay I'd buy her a brand new one. So we turned the tub onto its side onto the Scoot-N-Do and rolled it easily through the doorway and to its final location. No damage to the Scoot!
So, it's pretty much in position. I'm sure the plumber and I will have to tweak its location some and it's not exactly level yet, but the hard part is done. Sure looks nice!
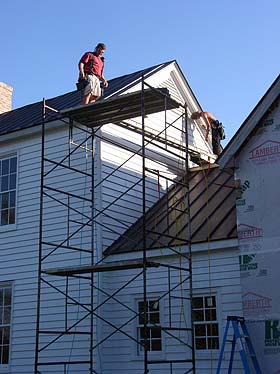
They also pointed out that it would be a really good idea for somebody to paint the top of this gable while they have their platform set up. Otherwise, if I hire a painter he's gonna have to rig something similar all over again. Good point. Since I don't have a painter lined up, I guess I'll be headed up there tomorrow myself. That'll be a new height record for me. -- Bill October 15, 2006
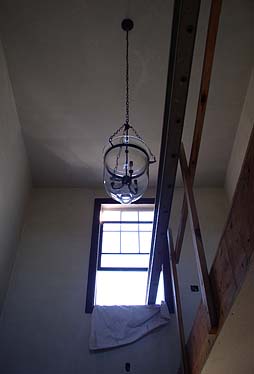
I had such big plans for the weekend. And now that it's over, I accomplished very few of them. I got stuck in a neverending spiral of "can't do that until I do that."
So far so good. Except I can't hang the light fixture until I go buy a shorter nipple for the bracket because the electrician roughed in with a shallow box.
Now, I can start on the stair trim.
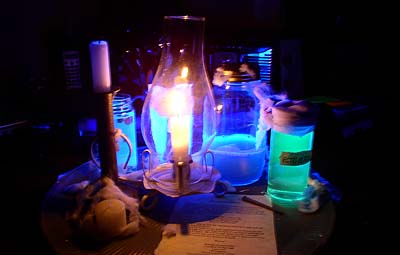
And now it's dark. October 17, 2006
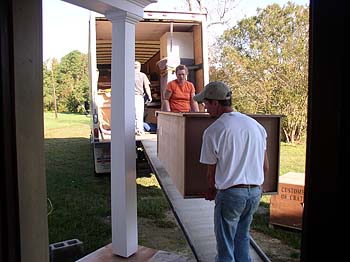
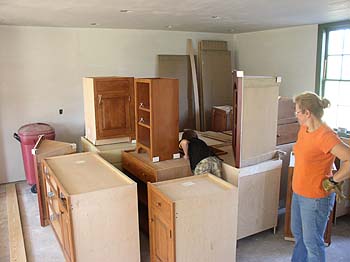
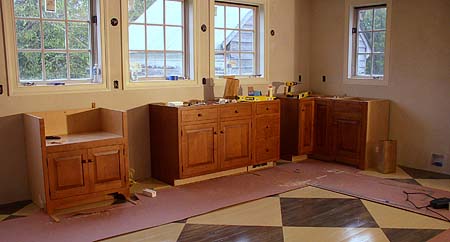
Today we started the installation of the kitchen cabinets. It's rather slow and tedious work getting each piece leveled and aligned with the next and ensuring that you're leaving exactly enough room for appliances.
I consulted with our rep at Crown Point and he went over exactly how he would approach the installation, which was very helpful. We started with the right-hand corner cabinet and worked our way left. Tomorrow, we'll put in the left hand corner cabinet and work back to the sink cabinet. In the photo above, the first cabinet is for a farmhouse sink, then the space is for the dishwasher, and the next space before the corner is for a 15" beverage refrigerator. Turning the right corner, there will be a small bar sink under the window and then the refrigerator goes to the right of that.
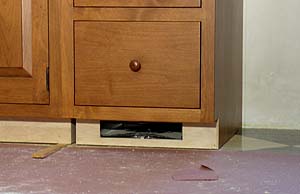
Working in the kitchen today I noticed two things. First, the wall outlet for the microwave was missing. Luckily I had taken photos of every single interior wall after electrical and plumbing had been run and before insulation went in. I referred back to the photo of this wall and, sure enough, the outlet box was there. So the sheetrock hangers went right over it and forgot to cut it out. Using the framing photo I was able to triangulate exactly where the box was and cut it out. The other thing I noticed is that we have no plumbing for our dishwasher. It's possible that the plumber intended to just tie into the water supply and drain line from the adjacent sink. Or else he just overlooked it. And I did too. Either way, it won't be difficult to add. October 19, 2006
I had a friend in high school who was fond of saying, "Grandma was slow, but she was old." I've been hearing him saying that in my head a lot the last two days.
Here's a puzzler for everybody...
October 22, 2006
Everybody's big on lists of ten reasons for this and ten ways to do that. So I thought I'd contribute my own. As I worked yesterday I scribbled down these random tips on a scrap of wood. Maybe you'll find one item in the list that's new to you and of some value. Maybe.
2) Which leads to tip #2. Get to know the beauty of a carpenter's pencil. The funky flat design of this pencil isn't just to be funky. It's actually very useful. First, flat doesn't roll away from you, which is always nice. But most importantly, that flat edge is essential when marking scribes because you can lay it flat against the edge you're scribing without it wobbling in and out. Plus, when sharpened correctly, the line that you draw will always be offset exactly 1/16". Turn the pencil the other way (narrow edge against the board you are scribing) and your line with be offset exactly 1/8". The carpenter's pencil is your friend. 3) Learn how to hold a hammer. For some reason, I used to always grip the hammer with my thumb extended up the back of the handle. Doing this doesn't enable you to really hammer from the wrist, which is where the power comes from. It was a hard habit to break, but I finally trained myself to wrap my thumb around the handle and it has made all the difference. More control and more power. 4) Glue all miters. I started doing this about halfway through the game and it really makes a big difference. Especially outdoors where moisture can cause beautiful miters to open up and look awful. 5) Pre-score jig saw cuts to keep from splintering the wood. Especially with pine. I use a utility knife and score the cut and then cut to the waste side of that score. (My new jigsaw came with an "anti-splintering guide," but I haven't tried that yet.) 6) When using a tape measure to measure and mark a board for cutting don't just make a pencil line at the desired length. Instead, mark a "V" that points to the dimension. Then take your square and mark your cut line running right through the point of the "V." The benefit is that there is no question where the cut line should be, whereas a single line will probably be slanted if marked quickly. And if you're working with another person, the "V" takes all of the question out of it. 7) Talk to yourself. Well, it works for me. I get easily distracted, which can lead to careless mistakes. So, on the way to the table saw I can be heard repeating mantras like "Leave the tongue. Cut off the groove." I know, it makes me sound simple, but it works. 8) Don't clean oil base paint brushes. When we finish using a brush for oil base primer or paint, we slip them into a zip-lock bag and stick it in the freezer. Next time we're ready to prime again, we grab that brush, thaw it out a little in the sun, and get back to work. We do this over and over and over again and the brush stays nice and workable. And we never have to deal with the mess of cleaning the brush with paint thinner and then disposing of the paint thinner. 9) Take photos of any open walls before they're insulated so that you have a permanent X-ray view showing wiring and plumbing. I've been referring to the photos that I took quite a bit. 10) Don't start a "ten tips" list unless you're sure you can really come up with ten tips. That 4X4 sticking out from the wall in the room above the garage is the tail end of this.
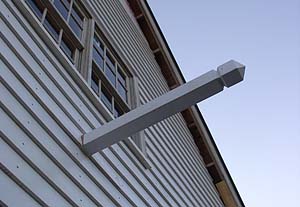
Once we find a light fixture it will hang from this post over the garage door. I cut the finial end on the cedar post. And I guess I also need to trim off the other end inside the house. October 25, 2006
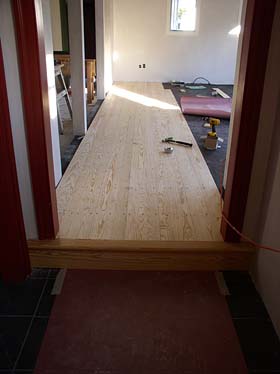
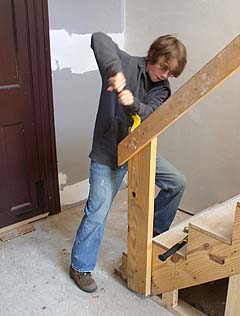
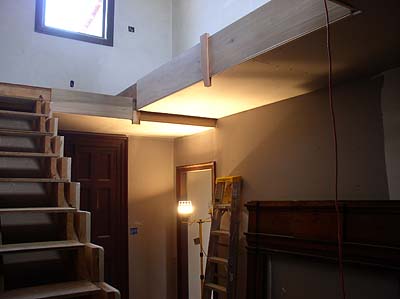
I haven't posted for the last couple days because every brain cell I have has been tied up as I began work on the center hall staircase. This is a project that I always planned to hire out because I thought it was way out of my league. But then we wound up spending the money that I had dedicated to this job on hiring the guys to finish the siding, so here I am. And I'm actually glad it's worked out this way because I'm having a lot of fun with it. The look of the staircase is key to setting the tone of the house. We want a casual/informal Colonial farmhouse feel as opposed to something fancy and formal.
I'm using poplar for the skirtboard and band boards because it's the only species that I can readily get in wide enough widths and it paints up well. Of course "readily" is relative. I waited 5 weeks for some of these boards.
The band boards are in place with spacers for the newells that will be added later. Once I make them.
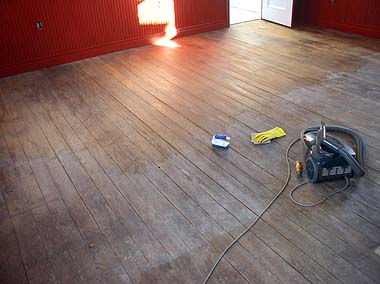
Gay's been working on the floor in the law office. It probably hasn't been cleaned for 40 years. She's been scrubbing and scrubbing and digging ancient dirt out from between the boards. It's looking good and will look even better once it's been oiled. Right now its moisture content must be zero. October 30, 2006
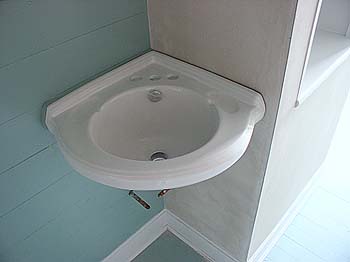
I switched gears this weekend. Instead of starting on the heart pine we focused on finishing up the last details in the bathrooms so that they're all ready for the plumber to come in and install the toilets and sinks. Mostly this meant installing baseboards, shoe moulding, and doing some final painting.
The plasterer totally killed the right angle that I had carefully framed for this sink so I wound up having to cut a tapered block to go behind one side of the sink. (You can see it on the left in the photo.) Aside from that complication, I'm not real happy with the way that the sink hangs. The front corners sit on wall-mounted brackets while two lag screws go through the back corners into the wall. The problem is that the front really isn't secured from being knocked upward, bouncing on those brackets. Knock it upward hard enough and I could see the sink breaking around those lag screws in the back. Plus, any movement will make it hard to maintain a caulked seal along the wall. I'm thinking about finding some kind of neoprene gasket that I can cut to shape and put between the sink and the wall to get a better seal.
Have a Happy Halloween! -- Bill |