ONLINE JOURNAL
These journal entries track our progress as we undertake our adventure of restoring this very old home. The main reason for keeping this journal on the web is that we have found that there are very few resources (books or websites) that follow all of the trials and tribulations of restoring an old home...from start to finish.
July 1, 2001
Wow it was hot this weekend! Removed some more asbestos shingles from the 19th century gable end. I need to slow down on the shingle removal and make sure that I am redoing all of the waterproofing as I go. This means replacing all of the flashing, caulking, etc. Have to say one thing for the ugly asbestos shingles...they were well installed and kept the house watertight. But in removing them, I am temporarily destroying all of that waterproofing integrity. (Just something to keep me awake at nights.)
Gay and her mom continue to make progress with their huge re-upholstering job.
Started painting the smokehouse that I primed in the spring.
Thanks for everybody's input on the house color question. Our final decision has been made. The house will be white, not yellow. Just consider the yellow to be a very nice primer.
Most important accomplishment for the weekend...hung a hammock with a great view of the creek. Took this picture of William at 6:00 Sunday morning. Nice early morning light. -- Bill
July 4, 2001
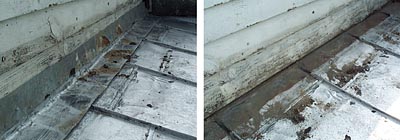
My main mission today was to address the flashing situation along the porch roof. With the asbestos shingles removed, the flashing was no longer effective. However, in removing the flashing I was happy to see that the metal roofing had been correctly installed; folding up behind the bottom clapboard. I just need to put a fresh coat of paint on the roof and we should be all set.
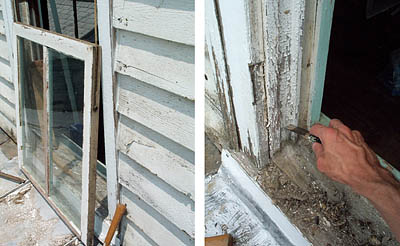
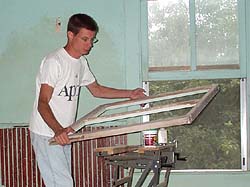
While I was up there I caulked around the window and then began casually scraping at the flaking paint. Was not really intending to tackle a window restoration job today but soon one thing led to another and I was removing the storm window and, shortly after that, removing both sashes. Before I was done I had even removed all of the glass from the sashes in order to properly clean out the failed glazing and reglue corners of the frame that had pulled apart.
With the window fully dissassembled I will be able to strip everything down to the bare wood, prime, paint, reglaze, and reattach the weights. Actually only one rope was broken, the other three pulleys and weights worked perfectly. This is the first window we've tackled, so what we learn here we can apply to the other 20 old windows in the house. -- Bill
July 6, 2001
Scraped, scrubbed, and painted the metal porch roof today. Only got into the mid-80s and there was a nice breeze but it was still hot up there. Took about one gallon of green-black paint and two gallons of orange Gatorade to get the job done.
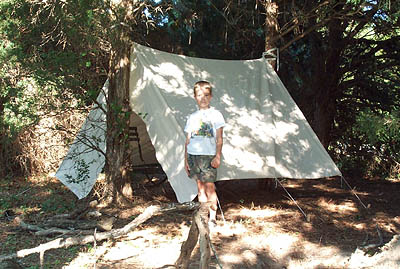
William's had his eye on our canvas drop cloths for a while now. Today one of them got a new life as a tent in the woods. William's really a happy camper now! -- Bill
July 9, 2001
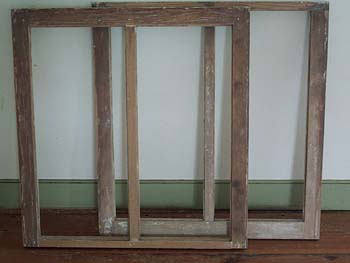
A visitor to this site e-mailed me that I must be a "glutton for punishment" for tackling these windows. I think she's right. I scraped out all of the old glazing putty and sanded the sashes down to the bare wood. Used dowels to re-peg two bad joints. After about 3 hours per sash, I had them ready for priming.
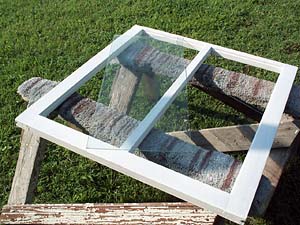
Once primed, I was ready to venture into uncharted territory...glazing.
I've never attempted to glaze a window before...and it became evident very quickly that I didn't have a clue what I was doing. Found out that one key is to keep your fingers very clean. The minute the putty starts sticking to your fingers you have to drop everything and go clean up with mineral spirits. Otherwise the putty just sticks to you and crumbles. I finally got a bead laid into the rabbet, dropped the pane in, and installed the glazier points. But I had no luck at all when I attempted to apply the face layer of putty. I would get a fat bead in place and drag my glazing knife to create that nice angle...but the putty would just crumble. Need to do some research on this topic this week. -- Bill
July 15, 2001
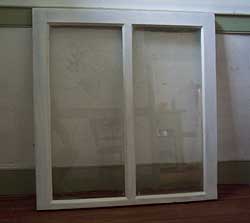
Thanks to everybody for sending me the great glazing tips. A little linseed oil on the putty blade did the trick...but it sure seems like it takes a long time for the putty to dry!
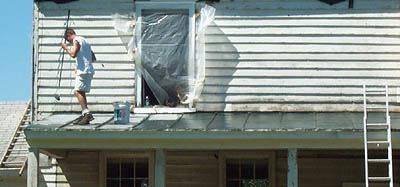
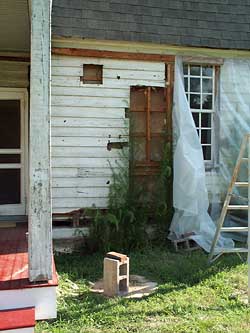
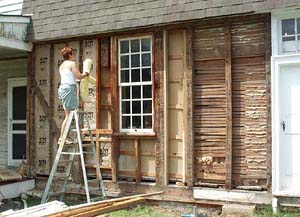
I pulled the plastic off of the back of the gambrel section today and stripped away the siding. This exterior wall had been enclosed in two separate additions, the first around 1890 and the second sometime in the 1950s. As a result, all of the 18th century siding is long gone. The remaining siding was a patchwork of holes from previous openings. (See last July.) The only option was to strip off all of this siding and begin again. Any siding that can be salvaged will be used for patching elsewhere on the 19th century portion of the house.
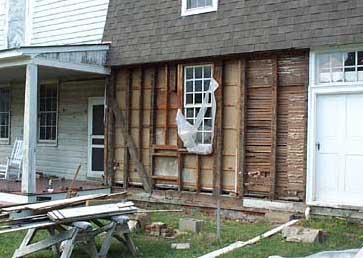
After a couple hours all of the siding was off, revealing the timber construction and the distinctive corner downbraces that are typical of early Chesapeake area framing. The sill looks good back here. One post shows pretty substantial insect damage about 3/4 of the way up. I will put a new post in beside it.
The old construction techniques are impressive with heavy use of mortise and tendon and pegging.
From here, my plan is to sheath the framing in plywood and then reface in beaded clapboard milled to match the remaining original 18th century siding on the other side of the door. -- Bill
July 22, 2001
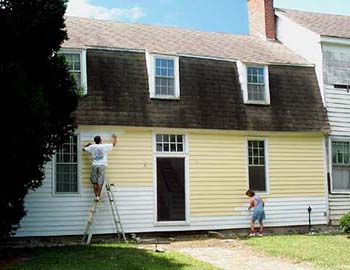
Well, the yellow is gone from the front of the house now and I will be able to sleep much better at night. My brother and sister-in-law volunteered their services and took care of the transformation quickly.
I wrestled with the putty on a second window sash. Each one is getting incrementally better than the last. But I'm very glad I started with a second story window. From the ground it will look perfect! -- Bill
July 23, 2001
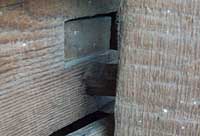
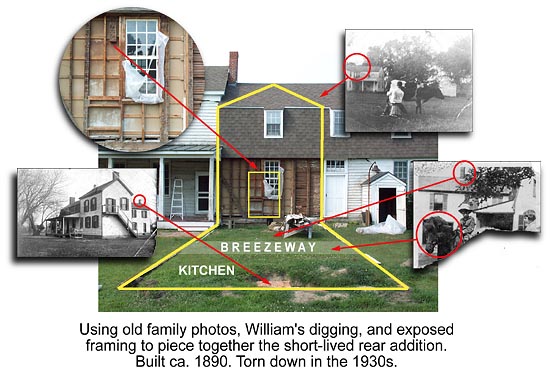
Here's an attempt to put together the clues that we've uncovered recently regarding the rear addition. A kitchen was at the back of the addition. The small chimney footing indicates to us that there was no fireplace; probably a wood stove instead. Photos also indicate another small chimney, so there should be another footing. A breezeway (visible behind the horse's head in the old photo) separated the kitchen from the rest of the first floor. The breezeway floor was raised and was probably wood. I would guess that there must have been three rooms upstairs...or possibly two very large rooms. A chopped stud makes me think that there was a fairly large opening leading from the gambrel portion into the addition. A lot of conjecture...but it's fun playing detective! -- Bill
July 29, 2001
Then I reinforced the studs in the open wall to give added support for the second floor plate.
Meanwhile, Gay installed insulation between the studs.
We're all ready for plywood sheathing, tar paper, and finally the new beaded board siding.
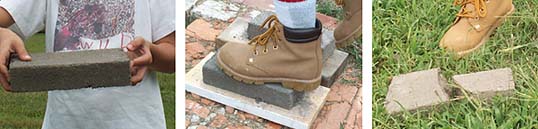
William has been experimenting with making bricks out of the creek mud. By this weekend, his first batch had been drying in the sun for a couple weeks and were ready for testing. They survived the "standing test" but didn't fare so well when dropped from waist high. So much for colonial brick-making! -- Bill |